Drake Does Dovetails

Heather Trosdahl

Heather Trosdahl

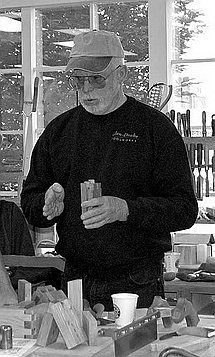
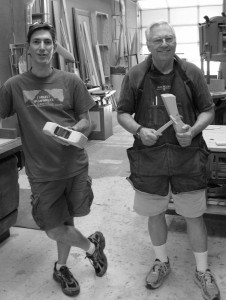
At the Lie-Nielsen Tool Event held at Timber Woodworking in January, 2011 I had the pleasure of meeting Kevin Drake, toolmaker and proprietor of Glen-Drake Toolworks (www.glen-drake.com). Kevin also happens to be a graduate of the College of the Redwoods, and his business is based in Ft. Bragg, CA. Assisting him at the Event was Heather Trosdahl (www.heathertrosdahl.com), another CR grad whose acquaintance I had made on my last visit to Ft. Bragg. Heather is a craftsman nonpariel.


Kevin Drake

Kevin Drake

Kevin Drake has developed a very precise way of laying out and cutting dovetails — by hand, of course — that allows the maker to fit joints perfectly right off the saw. No paring or fussing. His method involves some calculations in thousandths of an inch and the use of an offset marking gauge he developed (that takes into account the thickness of the saw kerf and the ‘give’ of the type of wood being worked). I leave it to you to explore Kevin’s web site and watch the videos detailing his tools and methods, but it’s really quite amazing.

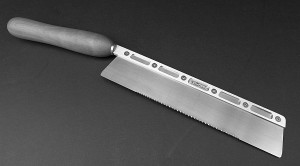
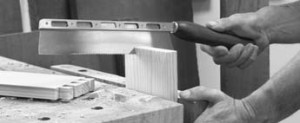
Among other things that Kevin makes (I bought one of his vernier-adjustable ‘TiteMark’ marking gauges, a superbly designed and made tool), I was intrigued by the saw he designed and makes for use in his dovetail system. I had the chance to try it at the L-N Event, and later when one of my students, visiting from San Diego, happened to have one of the saws in his tool bag.

G-D saw

The Glen-Drake Dovetail Saw

That’s all it took to convince me, and I was gratified a few weeks later when I received my own copy of the saw in the mail — a swap for some help I had given a friend on a design problem.

The unique features of the saw are:

  • no teeth cut in the leading and trailing 1.5″ of the blade
  • graduated teeth (16-12-16)
  • .020″ kerf (.015″ blade, .005″ total set)
  • ergonomically aligned handle
G-D saw

Glen-Drake saw

I am not adopting Kevin’s intriguing new dovetail method — old dogs are sometimes happy with their old tricks — but just using the saw to cut dovetails I’ve been very impressed by it. I’m doing a dovetail demo at Rockler on Saturday, June 18, and will have my Glen-Drake saw along for everyone to see.

Posted in Uncategorized | 1 Comment

In A Metal Mood

Though I am a certified wooden plane geek, I’ve owned and used metal planes over the years as well. Not bench planes, so much, but special purpose planes: block, rabbet, side rabbet, shoulder/bullnose, scraper, spokeshave, etc.

Various Stanley Planes

The bench planes, plus a few specialties

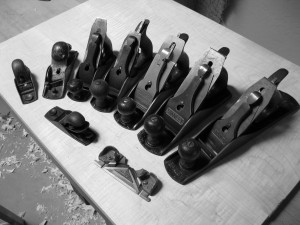
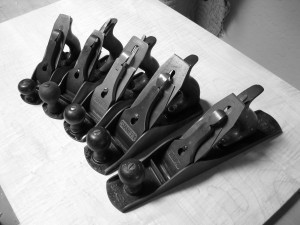
Lately, though, I’ve developed an interest in finding  and rehabilitating older Stanley bench planes, and so far I’ve gathered a small group of these that range in age from about 115 years to about 80 years. They are ‘users’, not collectors’ items, most of them having nicks or other damage that collectors eschew. A friend gave me a c.1890 #2C, and I picked up an c.1905 #3 that needed a lot of work for a couple of bucks at an estate sale (see the post “Old Soldiers…“). I had had a c.1930 #4 for a while, to which I added a Hock replacement iron, and another friend gave me a c.1930 #4-1/2 a few years ago in return for some help with an Inca jointer. Then recently I picked up a c.1910 #5 for a few bucks on eBay, and I’m currently awaiting the arrival of a same-era #7, which will probably round out my ‘collection’.

Stanley Bench Planes

Stanley Bench Planes - 2, 3, 4, 4-1/2, 5

The other notable addition to my stash of metal planes is a new Lie-Nielsen #51, a remake of the old Stanley #51 “chute” plane (mfr. 1909-1940). These were prized by by patternmakers for their ability to make precision cuts in end grain. For a furniture maker, it’s essentially the ultimate plane for shooting mitres, squaring frame ends and similar tasks. With it’s skewed iron, precision ground L-shaped casting and near 10 pound weight, the Lie-Nielsen is a delight to use.

L_N 51

The L-N #51 at rest

Lie-Nielsen 51

The L-N #51 at work

L-N 51 joint

A shot joint, detail (not clamped or glued)

Posted in Uncategorized | Leave a comment

Making Wooden Planes

Some Wood PlanesMaking and using wooden hand planes are among my favorite things to do, so I was pleased when Phil Groben and Ryan Edwards chose to make planes with me in the April 23-24 session. Understanding the critical points of plane making and use allows you the flexibility to make planes of all kinds, for ‘normal’ use and special purposes. It also informs the process of tuning up and using metal planes — the principles are pretty much the same.

Small PlanesPeople often ask me, “Why wooden planes?” as opposed to steel or iron. True, both types can be make equally fine cuts — and more than a few folks would argue that steel planes are easier to adjust, generally, than their wooden brethren. Well … perhaps.


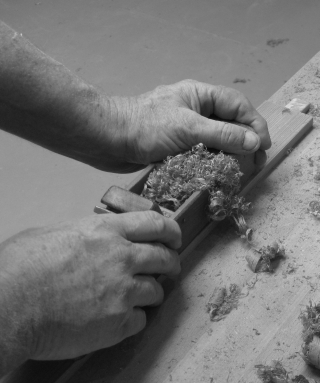
planing woodJim Krenov used to talk about the wooden plane as an instrument, as sensitive in the hands of a craftsman as a fine violin in the hands of a master musician, and I agree with him. You can hold it and use it in ways impossible (or at least awkward and uncomfortable) with a standard metal plane. It responds to changes in pressure as you use it, and with your hands wrapped around the body the process of planing wood becomes more of a sensory experience (I would go so far as to say ‘sensual’).


two new planes

Ryan (L) and Phil with their new instruments

Making a smoothing plane from start to finish in your own shop should take about a day, from start to finish. It fills up all of two days  in class, and that’s starting with pre-milled body blanks so that we can skip some of the grunt work. There is still plenty to do: aligning the parts properly and doweling them, locating and making the cross pin, and gluing up the blank; grinding, honing and polishing the plane iron and mating it to the chip breaker; cleaning up the body once it’s out of the clamps, fitting a temporary wedge and flattening the bottom of the plane; carefully opening the mouth with a file; making and fitting the permanent wedge; shaping the plane and, of course, making fine adjustments to the wedge and mouth until all is in harmony and the plane is able to take an incredibly fine shaving from a piece of hard maple.

plane adjusting hammer


We also make a small plane adjusting hammer, using a 3.5oz piece of turned and milled brass for the head and shaping and fitting an appropriate handle from ash.


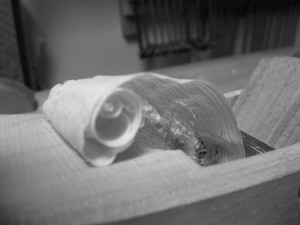
There’s nothing quite like the feeling you get the moment that first shaving exits the throat of a new plane, made with your own hands. I hope you’ll consider joining me for a plane making session in the future.

First Shaving

That sensual, first shaving ...

Posted in Uncategorized | Leave a comment

Table Class, v1.0

A couple of weekends ago we held the first 3-day “Make a Table” class on the schedule. I think I learned at least as much as the two erstwhile students, Charles and Mike — but about different things.

[Not a valid template]Making a table – even a fairly simple one –  in three days is a lot to bite off, even if you aren’t discussing all aspects of each step of the process. So while we didn’t hit all our marks, I was pleased with the progress we made and felt like we covered most of the major topics. It’s pretty easy to get sidetracked, spending time tuning up the right tool for a particular job or discussing the relative merits of different wood species.

I learned a lot about how to manage the class a little better next time, and both Mike and Charles had great suggestions for improvements that I will try to implement. Feedback like that is invaluable.

I am building the actual class prototype table now, so it will be ready for the next class. I’m looking forward to it.

A few images from the class….


Posted in Uncategorized | Leave a comment

Old Soldiers Never Die …

aka “The Rehabilitation of an Old Stanley Plane”

I love to make wooden planes, but metal planes have a place in my toolbox, too. Like many hand tool freaks I have an attraction to the Lie-Nielsen planes — improved versions of many of the old Stanleys — but not often the wherewithal to buy them. I prefer older Stanley planes for the same reason I prefer older machinery — the castings are better, the tools overall are more well-made (imho). And, I’m a skinflint who would most often rather buy an old junker and fix it up than get something new.

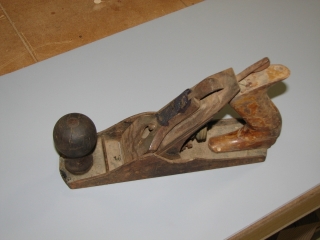
I was recently at an ‘estate sale’ that had a lot of tools for sale. There were a number of nice old Stanleys in apparently good, usable condition, not cheap but not ridiculously priced. Still, I passed these up in favor of the always-present ‘bucket-o’-tools’, in which I poked around and came up with an old Stanley #3. This old guy had a large chip missing from one cast wing, the tail tab was broken off, and the 1-3/4″ iron had been replaced long ago with a non-Stanley. Otherwise complete and intact, I bought this little treasure for all of $3.00.

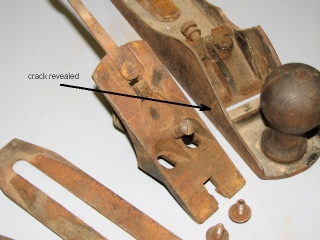
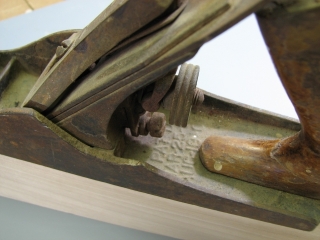
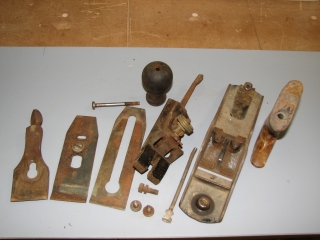
The thing had a lot of grime and surface rust (no pitting that I could find, except for the replacement iron that seemed in bad shape). Once I got it home and was able to disassemble, clean and inspect it I found that the body casting was cracked clear through on the right side, from mouth to top of the wing. Bummer. But repairable.

The plane itself is what is known as a “type 9” #3, manufactured between 1902 and 1907 (I refer you to this online reference for identifying Stanley planes: http://www.hyperkitten.com/tools/stanley_bench_plane/ ). The replacement iron — which turned out to be beyond redemption — was a Norvell-Shapleigh “Diamond Edge”, made between 1901 and 1911. I love old stuff.

Most folks by now would have put this plane back out with the trash, I suspect. Certainly it holds no interest or value for the collector, and even for a user it’s a bit of a stretch. But if the crack can be repaired, it’s other shortcomings won’t prevent the plane from being returned to usable condition. So I continue ….

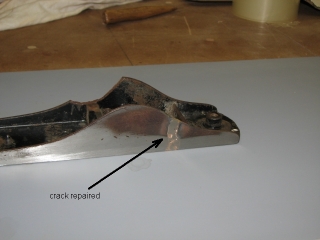
I am not a metal guy but my neighbor, master woodworker and machinist Kim Thoma, is. I did some reading up on welding/brazing cast iron, then took the plane to Kim and asked him what he thought. Literally, in about ten minutes, he had poked through a pile of rod and pulled out his TIG welder, ground the crack into a ‘V’-groove, and welded the thing back together. I still have some grinding to do, and the result will never win any awards for pretty, but the fix is functional.

Next up: de-rust and clean all the parts, glue and smooth the rosewood tote and knob and check the fit of the frog. Since the iron is toast I will most likely get a new #3 replacement iron and breaker from Ron Hock (http://www.hocktools.com/). But I’ll report on all that in another post.

Posted in Uncategorized | Leave a comment

(my) Good Ol’ Days

I lived in northwest Alaska from 1976 through 1992, with a break for two years (1984-1986) while I attended the College of the Redwoods Fine Woodworking Program. My wife and sons and I lived in a semi-traditional sod house, or ‘iglu’  —  about 14′ x 16′, spruce post and beam frame covered by spruce boards milled by chainsaw, 6mil visqueen (that’s the non-traditional part) and dirt and sod. The nearest road was about 300 miles to the east. Our nearest neighbor was a small Inuit village, 12 miles east on the Kobuk River, and another family 15 miles west, downriver.

Little Shop North of the Arctic Circle

We traveled by dog team in the winter and boat in the summer. We worked for wages 8-12 weeks each summer, and lived off the land the rest of the year. Besides our two caches, the only outbuildings we had were the outhouse and the woodshop. This was a small (10′ x 12′) log structure 30′ or so from the house. A friend passing by our old place a couple of years ago sent this image of the front of the shop.

Posted in Uncategorized | Leave a comment

A Leaf-Peeper’s Tale

My wife, Marcia, and I traveled to the states of Maine, New Hampshire and Vermont in early October. The purpose of the trip was to see the fall foliage and visit friends in Vermont. Of course I took every opportunity to include wood, tool and furniture-related stops along the way. Marcia is used to this sort of behavior, and suffers it well.

Lie-Nielsen Toolworks

We stopped at the Lie-Nielsen toolworks (factory and showroom) near Warren, Maine, where I tried their new #51 shooting board plane (very, very nice) and picked up one of their joinery floats. I also ran into Deneb Puchalski who I met last spring out here at the L-N event in Mesa.

Lie-Nielsen showroom

Deneb invited me to demonstrate in January when he and the Lie-Nielsen road show return to Timber Woodworking (January 14-15, 2011), and I’m happy to take him up on the offer.

Next on the trip was a visit with Peter Korn at the Center For Furniture Craftsmanship in Rockport, Maine.

Center For Furniture Craftsmanship

Peter founded the school in the early ’90’s, and since then it has become a non-profit foundation. Peter still directs the school and has been instrumental  in helping it remain true to its founding principles while steadily expanding both facilities and course offerings. Instructors working during our visit included Kevin Roedel, Chris Pye, Tom Hucker, Peter Fleming, and Craig Stevens. The school’s emphasis on craftsmanship place it on par with the College of the Redwoods and the North Bennett Street school. I recommend that anyone considering attending a school for short (1-2 week) or long (3-9 month) term programs give the Center For Furniture Craftsmanship a serious look.

Also located at the school is the Messler Gallery, which was currently showing the work of the New Hampshire Furniture Masters. Included in the show was work by David Lamb, Ted Blachly, Leah Woods and others. The craftsmanship of the work displayed was extraordinary.

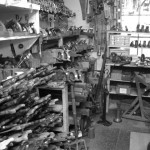
Further up the road in Liberty, Maine we stopped at the Liberty Tool Company. In business since 1976, Liberty specializes in old hand tools. Buckets of planes, bins of saws, walls of braces. Three floors, and far too much stuff to see in an hour visit (we didn’t even visit their annex across the street). I picked up a nice old Stanley#102 ($13) and a tiny ball pein hammer($0.50), now rehandled  for use as a plane adjuster.

Liberty Tools

Buckets & bins o' tools

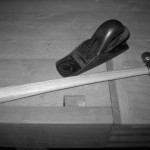
sweet #102 and friend

—————————————–

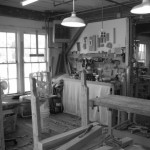
In Bridgewater, Vermont we stopped at the workshops and showroom of Shackleton Thomas Furniture & Pottery. Charles Shackleton produces several lines of furniture of all kinds, set apart from other manufacturers because each piece is made by a single craftsman, and there is an emphasis on hand tools and methods. The shop was not working the day we visited, but we were able to peer inside and of course look at the very finely made furniture in the showroom. It’s nice to see craftsmanship and hand work not only revered but commercially successful as well. A bonus for us was that Charles is a cousin of the famous Antarctic explorer Sir Ernest Shackleton, certified tough guy and one of our favorite heroes.

Shackleton & Thomas

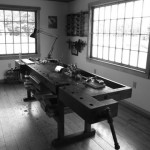
Shop at Shackleton's

Showroom at Shackleton's

———————————————

And that ended our sojourn as “leaf peep-ahs”.

Posted in Uncategorized | Leave a comment